Text to Speech with Multiple Voices — Complete Multispeaker Guide (Fish Audio)
Single-voice TTS sounds flat for dialogues, audiobooks, and podcasts. This guide shows you how to find and organize voices on Fish Audio, then use multispeaker in TTS and Story Studio to produce natural, multi-character audio — without traditional voice recording workflows.
March 2026 | Fish Audio Multispeaker TTS is now available on S2 Pro
Table of Contents
- What Is Multispeaker Text to Speech?
- Step 1 — Find the Right Voices with Discovery
- Step 2 — Multispeaker in Text to Speech
- Step 3 — Multispeaker in Story Studio
- TTS vs Story Studio — Which Should You Use?
- Use Cases — What Can You Make with Multispeaker TTS?
- From Script to Audio — In One Session
- FAQs About Multispeaker TTS
Most text-to-speech tools give you one voice. One narrator. One tone, from start to finish. For a single-speaker explainer, that works fine. But the moment your script involves two characters talking, a host and a guest, or a story with distinct roles — a single voice turns dialogue into a flat, monotonous read-through. Listeners disengage fast.
Text to speech with multiple voices solves this. Assign a different AI voice to each speaker, control the timing between them, and the result is a conversation that actually sounds like one. Fish Audio functions as a complete text to speech dialogue generator — covering everything from voice discovery to multi-chapter exports. This guide walks you through the full workflow: how to discover and organize voices, how to use multispeaker in the Text to Speech tool for shorter content, and how to scale up to full productions in Story Studio.
What Is Multispeaker Text to Speech?
Multispeaker text to speech is a TTS workflow where different segments of a script are assigned to different AI voices — each with its own tone, gender, age, and speaking style — and then generated as a single, continuous audio output.
Traditional TTS tools are built around a single narration model: one voice, one text input, one audio file. That design works for audiobook narration with a single narrator, voiceovers, or announcements. It breaks down entirely for anything involving dialogue. To produce a two-character conversation with legacy tools, you'd generate each speaker separately, then manually stitch the audio together in an editor — adjusting timing, matching loudness levels, and hoping the transitions don't sound like two different recordings.
The problem isn't just the extra steps. It's that the timing between speakers is almost impossible to get right without dedicated controls. Real conversation has rhythm: a beat of silence before a reply, a slight overlap when someone interrupts, a longer pause before a difficult answer. Without precise control over inter-speaker gaps, even well-cast dialogue sounds robotic.
Multispeaker TTS tools address both problems. Each speaker gets their own voice and their own text block. The gaps between speakers are adjustable. The final output is a single, coherent audio file — with the timing baked in.
Multispeaker text to speech allows you to:
- Assign a different AI voice to each speaker in a script
- Control the timing and pause between each speaker
- Generate an entire dialogue as a single, continuous audio file
- Scale from a two-character exchange to a full cast — without additional exports or manual editing
Step 1 — Find the Right Voices with Discovery
Before you can build a multispeaker project, you need voices. Fish Audio's Discovery page is where you find them — and with thousands of voices in the library, the filtering tools matter.
Go to fish.audio/app/discovery/.
Search and Filter
The Discovery page opens with a search bar, quick-filter tags along the top row, and sort and language controls on the right.
Search by name if you already know what you're looking for. Sort by Recommended or Trending to surface what's working for other creators. Language filters the entire library to voices trained in your target language.
The quick-filter tags on the top row cover the most common attributes — Male, Female, Young, Middle Aged, Narration, Social Media, Deep, Soft, Professional, Dramatic, Mysterious, Anime — and you can combine them. Selecting Female + Young + Narration will immediately narrow the results to voices that fit that profile.

For more control, open the Filter panel (the sliders icon at the top right). This gives you:
- Languages — narrow to a specific language, with multi-language matching
- Tags — free-form tags added by voice creators
- Gender — Male, Female, Neutral
- Age — Young, Middle Aged, Old
- Use Case — Conversational, Narration, Character Voice, Social Media, Educational, Advertisement, and more
- Voice Qualities — Deep, Low, Medium, High, Soft, Bright, and 48+ additional descriptors

For a multispeaker project, the Use Case and Voice Qualities filters are especially useful. If you're building a podcast-style dialogue, you might want one Conversational + Soft voice and one Narration + Deep voice — distinct enough that listeners can tell them apart without needing to see the transcript.
Like, Bookmark, and Save to a Collection
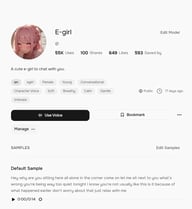
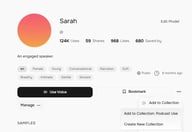
When you find a voice you want to revisit, you have a few ways to save it. The heart icon on each voice card in the search results is a quick Like — it adds the voice to your Likes tab for later reference.

For a stronger save, open the voice's detail page and click Bookmark. Bookmarked voices appear in the Bookmarks tab, separate from your likes, and are accessible directly from the voice selector in both TTS and Story Studio.
For project-level organization, Collections are the most powerful option. Click Collections in the top navigation, then Create Collection to set up a named group — for example, "Podcast Use" or "Audiobook Project A". Give it a title and description, then click Create.


To add a voice to a collection, open the voice's detail page, click the three-dot menu (⋯) next to the Bookmark button, and select Add to Collection. If you've already created a collection, it appears in the dropdown — one click adds the voice.
The payoff comes when you're inside TTS or Story Studio. When you open the Select Voice panel, your collections appear as tabs at the top — right next to Recently Used, Explore, Default Voices, My Voices, and Bookmarked. Instead of searching from scratch every session, your project voices are already grouped and ready.

Step 2 — Multispeaker in Text to Speech
Fish Audio's Text to Speech tool supports multiple speakers in a single generation. It's the right tool for short-to-medium content — dialogue snippets, ads, short podcast intros, demo scripts, and anything where you need a quick, polished output without chapter management. If you haven't found your voices yet, start by browsing the Discovery library first.
Go to fish.audio/app/text-to-speech/.
Set Up Your First Speaker
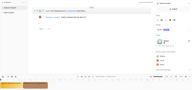
When you open TTS, you'll see a single text block with a voice selector at the top. Click the voice name to open the Select Voice panel and choose your first speaker. Type or paste the first speaker's lines into the text block.
You can also use inline emotion tags to shape the delivery — [sad], [emphasis], [excited] — placed directly in the text before the words they should affect.
Add More Speakers
Click + Add Speaker below the first text block. A new block appears, with its own independent voice selector. Choose a different voice for this speaker, enter their lines, and the two blocks will be generated as a single, continuous audio file — in the order they appear on screen.
There's no upper limit on the number of speakers you can add. Each block is independent: different voice, different text, different emotion tags if needed. In practice, most dialogue projects work well with 2–4 distinct voices — enough variety to be clear, without becoming hard to follow. On the right panel, you can fine-tune Volume, Speed, Loudness Normalization, and Text Normalization (which improves reading accuracy for numbers, currency, and similar formatted text) before generating.
Character Limit and When to Move to Story Studio
Keep an eye on the character counter at the bottom of the screen. The limit depends on your plan — check Fish Audio pricing and plan limits for your tier's specific allowance. For short and medium-length content, TTS is the faster, simpler workflow. But if you're working on something longer — a full audiobook chapter, a multi-segment podcast, a game dialogue script — that's where Story Studio gives you the tools you actually need.
Step 3 — Multispeaker in Story Studio
Story Studio is built for long-form audio production. Where TTS is optimized for quick generation, Story Studio gives you a structured environment to sequence multiple voices block by block — with precise control over timing between speakers and chapter organization for complex projects. Each block generates independently with its own assigned voice, and the final export stitches them into a single, continuous file. Go to fish.audio/app/story-studio/.
Create a New Project
Click + Project on the Story Studio home screen. The Create project dialog opens with these settings:
- Project Name — name your project
- Default Voice — the voice assigned to new blocks by default (you can change it per block)
- Speech Model — currently S2 Pro (newest)
- Text Normalization — when enabled, improves reading accuracy for numbers, currencies, dates, and similar text
- Loudness Normalization — normalizes volume levels across blocks for consistent output
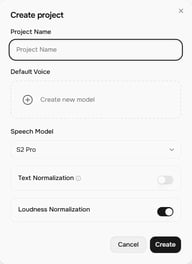
Click Create to open the project editor.
Add Blocks and Switch Voices
Your project opens with a default chapter and a first text block already in place. The first speaker's voice is shown as a colored avatar to the left of each block.
To add a new speaker's line, click the + button below any existing block. A new block appears. Click the colored voice avatar on the left side of the new block to open the Select Voice panel and assign a different voice. Type the second speaker's line into the block.
Repeat this for every exchange in your script. Each block is a single speaker's turn. The right-side panel shows Voices used in the project — a live list of every voice currently assigned across all blocks, so you can keep track of your cast at a glance.
Fine-Tune the Pause Between Speakers
Between each pair of blocks, you'll see a small timing bubble showing the current gap — for example, 0.35s. Click it to adjust the pause duration between that specific pair of speakers.
This is one of Story Studio's most important features for dialogue realism. Human conversation isn't a series of perfectly back-to-back utterances. A beat of silence before a reply signals processing time. A longer pause before an emotional response adds weight. Getting these gaps right is the difference between audio that sounds produced and audio that sounds real. Even a 0.2–0.5s adjustment can noticeably change how natural a conversation feels — it's worth tuning each exchange individually rather than leaving all gaps at the default. Adjust each inter-block pause individually to match the rhythm of the scene.
Add Chapters for Long Projects
On the left side of the editor, you'll see the Chapters panel. By default, every project starts with a single "Default Chapter." Click + to add a new chapter.

Chapters let you break long projects into navigable sections — one chapter per audiobook section, one per podcast segment, or one per scene in a game script. Each chapter has its own sequence of blocks and can be worked on independently. The final export combines all chapters into a single output, in order.
For anything beyond a few hundred words of dialogue, chapters are how you keep a Story Studio project organized and editable.
TTS vs Story Studio — Which Should You Use?
| Text to Speech | Story Studio | |
|---|---|---|
| Multispeaker method | Native (S2 Pro model-level) | Sequential block generation |
| Character limit | Plan-dependent | No limit (multi-chapter) |
| Number of speakers | Up to 5 | Unlimited |
| Inter-speaker pause control | ❌ | ✅ Precise, per-block |
| Chapter management | ❌ | ✅ |
| Timeline view | ❌ | ✅ |
| Best for | Short dialogue, ads, demos | Audiobooks, podcasts, game scripts, long productions |
The key technical difference: TTS uses S2 Pro's native multispeaker capability — multiple speakers are handled at the model level in a single generation. Story Studio achieves multispeaker output by sequencing separately generated blocks, each with its own assigned voice, into one continuous file.
If you're generating a 30-second ad with two speakers or a short dialogue clip, start in TTS — it's faster and requires no project setup. If your script is longer, involves more than a few exchanges, or needs precise timing between speakers, open Story Studio instead.
Use Cases — What Can You Make with Multispeaker TTS?
Audiobooks with Multiple Characters
Single-narrator audiobooks work well for non-fiction. For fiction with dialogue, a single voice reading all characters becomes difficult to follow. With multispeaker TTS, each character in a scene gets their own voice — a deeper, older voice for one character, a younger and more energetic voice for another. Story Studio's chapter structure maps directly onto book chapters, making it practical to produce full-length titles without traditional casting and recording workflows.
Podcast-Style Dialogue
Two-host podcast formats are one of the most recognizable audio structures in existence. With a multispeaker AI voice generator for dialogue, you can produce that format from a written script — one voice for each host, with controlled pauses that simulate natural turn-taking. This is particularly useful for content creators who want to produce regular audio content without scheduling recording sessions.
E-Learning and Training Content
Instructional content becomes significantly more engaging when delivered as a conversation rather than a monologue. A teacher-student exchange, a guided scenario, or a Q&A format can all be scripted and produced with two or more voices — helping learners process information through dialogue rather than passive narration.
Game Dialogue and Character Voices
Game scripts are often hundreds or thousands of lines across multiple characters. Using Story Studio as a multiple character voice generator, game developers and narrative designers can produce voiced dialogue for prototyping, demos, or full production — with each NPC assigned a consistent voice across every line they speak, without traditional voice recording workflows.
From Script to Audio — In One Session
Producing multi-character audio used to mean booking voice actors, coordinating recording sessions, and spending hours in post-production to stitch takes together. With multispeaker TTS, that entire workflow collapses into a single session: find your voices in Discovery, organize them into a Collection, build your script block by block, and export.
For short content, Text to Speech gets you there in minutes. For longer productions — audiobooks, podcast series, game dialogue — Story Studio gives you the structure and timing control to produce something that actually sounds like it was performed.
🎧 Create your first 2-speaker dialogue in under 2 minutes →
🎙 Turn your script into a full-cast audiobook with AI voices →

Sabrina is part of Fish Audio's support and marketing team, helping users get the most out of AI voice products while turning launches, updates, and customer insights into clear, practical content.